

Streamlining Your Development Workflow with Dev Containers, Cloud Run, and GitHub Actions
From local development to production, learn how to setup your projects for a more efficient, consistent, and automated software development process.

The purpose of this walkthrough is to get you up and running quickly, and show you how to set up and deploy a containerized application using a CI/CD pipeline. Although there are many ways of achieving this goal, we are going to do it with Dev Containers, Cloud Run, and GitHub Actions. A certain familiarity with Docker, Google Cloud Platform (GCP), and GitHub is assumed.
Sample code is available here, so you can follow along or use it as a boilerplate for your future projects.
Dev Containers
The Development Container Specification provides a framework for creating consistent and reproducible development environments packaged as Docker containers. These containers can be tailored to include all the necessary tools and dependencies for application execution during the development phase, which is incredibly helpful, as the configuration of secrets, settings, and other variables may differ between development and production environments. There are many other benefits to using dev containers, such as consistency across development machines, fast workspace setup, and isolation from other projects on your system.
Cloud Run
Cloud Run is a fully managed serverless platform offered by Google Cloud. It's a great solution if you want to deploy containerized applications quickly without managing the underlying infrastructure, while also benefiting from automatic scaling and pay-per-use pricing.
GitHub Actions
GitHub Actions is a CI/CD platform provided by GitHub. It allows developers to automate their software workflows directly within their GitHub repositories. Developers can create custom workflows using YAML files, allowing for flexible and tailored automation processes.
Let's Dive In
Before we begin, make sure you have Docker installed on your machine with at least 4GB of free resources. You will also need a GCP project, and a GitHub account. It's always a good idea to create a new GCP project to run an experiment or follow a tutorial, so you can simply delete the entire project without affecting other work or incurring in unnecessary charges.
Run the Application Locally on a Dev Container Using a JetBrains IDE
For instructions on how to use dev containers with Visual Studio Code, check out this tutorial.
Dev containers are defined using a
devcontainer.jsonfile and optionally aDockerfile. In the sample project, you will find a directory called.devcontainerthat includes such files.// devcontainer.json { "name": 'my-devcontainer@3.11', "build": { "dockerfile": 'Dockerfile' }, "containerEnv": { "GOOGLE_CLOUD_PROJECT": 'YOUR-PROJECT-ID', "CLOUD_RUN_SERVICE": 'YOUR-CLOUD-RUN-SERVICE-NAME', "ENV_VARIABLE": '${LOCAL_ENV_VARIABLE}', } }# Dockerfile FROM python:3.11-slim # Install system dependencies. RUN apt-get update && apt-get install -y \ apt-transport-https \ ca-certificates \ procps \ gnupg \ curl \ git \ python3-pip # Import the Google Cloud public key. RUN curl https://packages.cloud.google.com/apt/doc/apt-key.gpg | gpg --dearmor -o /usr/share/keyrings/cloud.google.gpg # Add the Google Cloud SDK distribution URI as a package source. RUN echo 'deb [signed-by=/usr/share/keyrings/cloud.google.gpg] https://packages.cloud.google.com/apt cloud-sdk main' | tee -a /etc/apt/sources.list.d/google-cloud-sdk.list # Update and install the gcloud CLI. RUN apt-get update && apt-get install -y google-cloud-cli # Install dev environment dependencies. RUN pip install 'Flask==3.0.3' 'Werkzeug==3.0.3' 'pytest==8.2.0'Right click on the
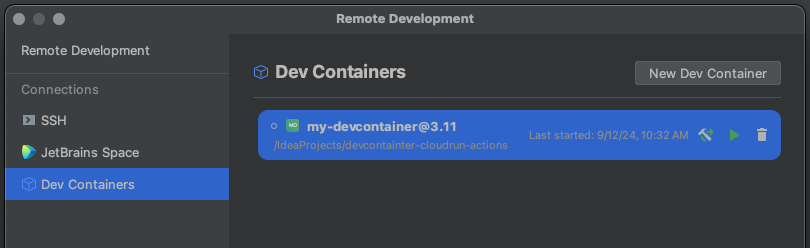
.devcontainer/devcontainer.jsonfile and select:Dev Containers → Create Dev Container and Mount Sources from the context menu.

After creating the dev container, select a JetBrains IDE from the list and click Continue. The selected IDE will be downloaded and the client will connect to it.
Once ready, you will see the IDE running in the dev container. If nothing happens, go to Dev Containers → Show Dev Containers and choose the container to run.

You can now run the application by opening the terminal in the dev container IDE and typing:
python3 main.pyOpen a browser window and navigate to the url shown in the terminal logs to see the application running locally. If you see the message “Hello, World!” then the application is running successfully. If you see an error, make sure you are forwarding the port —see additional notes in the sample repository’s README.md file.
Set Up Your Cloud Run Service
In the
devcontainer.jsonfile, update theGOOGLE_CLOUD_PROJECTandCLOUD_RUN_SERVICEenvironment variables with your GCP Project ID and the name of the Cloud Run service. You don't need to set up the service in advance, just pick a unique name. Rebuild the dev container.Open a new terminal in the dev container IDE and run the following command to authenticate with GCP:
gcloud initClick on the link and follow the sign-in prompts. Once finished, copy the verification code and paste it in the terminal.
Enable the Artifact Registry API on your GCP project and create a repository. If you don’t already have an artifacts repository, just pick a name and a new one will be created:
gcloud artifacts repositories create YOUR-GCR-ARTIFACTS-REPO
  --repository-format docker
  --project YOUR-PROJECT-ID
  --location us-central1
In the sample project, you will find a
cloudbuild.yaml, a configuration file used in Google Cloud Build, which is a service for executing your builds on Google Cloud Platform.steps: - name: 'gcr.io/cloud-builders/docker' args: ['build', '-f', 'Dockerfile', '-t', 'us-central1-docker.pkg.dev/YOUR-PROJECT-ID/YOUR-GCR-ARTIFACTS-REPO/YOUR-SERVICE-NAME:latest', '.'] - name: 'gcr.io/cloud-builders/docker' args: ['push', 'us-central1-docker.pkg.dev/YOUR-PROJECT-ID/YOUR-GCR-ARTIFACTS-REPO/YOUR-SERVICE-NAME:latest']Using this file, build the container image and push it to the Artifact Registry:
gcloud builds submit
  --config=cloudbuild.yaml
  --project YOUR-PROJECT-ID .
Make sure your image appears in the Artifact Registry.
The sample project includes basic tests that build and deploy the app. You can run these tests by simply typing:
pytest
Deploy to Cloud Run Using GitHub Actions
In your GCP dashboard, create a service account and generate a key for it in JSON format. Give the service account the following roles:
artifactregistry.writer,run.admin, andiam.serviceAccountUser.In your GitHub repository settings, add the key to Secrets & Variables → Actions → Repository Secrets. Name it GCP_KEY.
Inside the
.github/workflowsdirectory you will find a YAML file namedcloud-run-deploy.yaml. This file contains the required instructions to deploy the application every time you push to the main branch.name: Deploy to Cloud Run env: SERVICE_NAME: YOUR-CLOUD-RUN-SERVICE-NAME PROJECT_ID: YOUR-PROJECT-ID DOCKER_IMAGE_URL: us-central1-docker.pkg.dev/YOUR-PROJECT-ID/YOUR-GCR-ARTIFACTS-REPO/YOUR-CLOUD-RUN-SERVICE-NAME on: push: branches: - main pull_request: branches: - main jobs: dockerize-and-deploy: runs-on: ubuntu-latest steps: - name: Checkout repository uses: actions/checkout@v4 - name: Google Cloud Auth uses: 'google-github-actions/auth@v2' with: credentials_json: '${{ secrets.GCP_KEY }}' project_id: ${{ env.PROJECT_ID }} - name: Set up Cloud SDK uses: 'google-github-actions/setup-gcloud@v2' - name: Configure Docker run: | gcloud auth configure-docker us-central1-docker.pkg.dev - name: Build and Push Docker Image run: | docker build -t ${{ env.DOCKER_IMAGE_URL }}:latest -f Dockerfile . docker push ${{ env.DOCKER_IMAGE_URL }}:latest - name: Deploy to Cloud Run run: | echo SERVICE_NAME $SERVICE_NAME gcloud run deploy $SERVICE_NAME \ --image ${{ env.DOCKER_IMAGE_URL }}:latest \ --platform managed \ --region us-central1 \ --allow-unauthenticatedPush to the main branch and check the Actions tab in your GitHub repository.
Once the deployment is successful, you can access the application by clicking on the Cloud Run “Service URL” in the GitHub Actions logs.
Wrapping Up
By leveraging Dev Containers for consistent development environments, Cloud Run for secure and scalable services, and GitHub Actions for automated workflows, you've set up a robust and efficient system for developing all sorts of applications. As you continue to build and refine your projects, I hope this setup can serve as a solid foundation, easily adaptable to your specific needs. Happy coding!
Resources
Development Containers Specification by Microsoft
Developing inside a Container by Visual Studio Code
Using Dev Containers in JetBrains IDEs by JetBrains
Docker Official Images for Python by Docker
How to Deploy a Dockerized FastAPI to Cloud Run by @thaddavis
Quickstart: Deploy a Python Service to Cloud Run by Google
Cloud Run Hello World Sample by Google